10/10/2007
What we have purchased so far:

We won the house window on eBay $50
Purchased 14mm exterior grade ply 2400x1200 $25 sheet from Kastoria Furniture Company 14 - 16 Davies Ave Sunshine North (Bunnings was $45 sheet) $100
We brought 4 sheets but 3 would have done.


3 tubes of Aquarium grade silicon $16 from Mitre 10
Pine Framing from Bunnings $15
Gripset51 2x2 lt, Bunnings $58
Two side windows, got the glass for free from Dad. (Just had it lying around)

Two tins of Bostik expanda foam $14
Pond Drain $5 Bunnings
4 Sink Strainers for Land Drainage $5
4 lt Cream Semi Gloss Paint $25 Market
4 Lockable wheels $10 Market
Mini Corrugated Iron $31 Bunnings
Total spent so far $339.
So far we have cut out all the panels, and put two coats of the Gripset. Cut out and routed sides for the windows. Joined together the sides, base and back.
Measurements are 1500mm High x 1250mm width x 700mm deep.
Be back when we have done more!!
Ann
Any info regarding the keeping of frogs go to:
http://frogs.org.au/community/

17/10/2007
We have attached a "rim" of pine 15cm down from the top, this will be where the screen lid sits, and the lights above that. The extra 15cm will hide the lights. Two coats of Gripset have been applied, and a 15 cm plank of ply

20/10/2007
Making progress on the "rock wall" and water fall! We are using layers of polystyrene foam of all different thickness. We have got all the polystyrene for free, scraps around building sites, boxes from the fruit and veg and packaging material from shops.

Non Toxic PVA/Wood glue is working well for joining the foam. Of course only discovered it was better than the silicon 3/4 of the way through!
After joining the sheets, we are carving out the design.

It is very messy! But have discovered the Hot Wire Cutter, available from hobby shops or eBay!
Brilliant gadget.

24/10/2007
Filled in gaps with extra polystyrene foam, then used the expanda foam to fill in any spots that I thought the frogs could get stuck in or access the back.
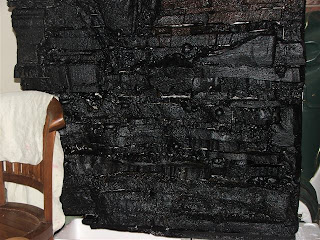
Used the heat gun over the whole thing, this hardens it, makes it easier to paint and adds lots of great texture.
Coated it all with the Gripset51, may not be necessary but I worry about the expanda foam being toxic, and as I already had the Gripset thought I would coat it all with that. Still have some white patches, but they will be covered with the rest of the colours.

25/10/2007
Spent the last sixish hours painting. Well worth it I think, wait to you see the pics! After the last session I was having a "oh, no what have I done" time. I have had these a few times while trying to create the rock wall! Very hard to have confidence that each step will help you achieve the picture in your head. Especially when it looks nothing like it!
The six hours went something like this:
With a damp rag applied brown paint, the goal was to have an uneven layer over the black, but still see some black here and there, and to try and cover more white.
Working from top to bottom for each coat, hoping that all though some will be touch dry, some will be still wet, to try and achieve a blend of colours.
I next applied gray paint with a small brush. I was a bit worried about this as I wanted it to be random, and being a very methodical person, wasn't sure I could do "random"! lol
Anyway I methodically concentrated once again on getting rid of any white and by having a smaller brush I did end up with random.
Next was the same all over again but used a even smaller brush and green paint, I also went over some of the green with a damp rag.
Last layer, I have used a small amount of a terracotta coloured pond sealer, and watered it down a lot. I then rung out a damp rag in the terracotta, wiped it over the wall, and wiped it off again with a dry rag. I only wanted to lighten the wall and add highlights, so didn't want a lot of the terracotta.
After doing some research the brown, gray and green paint was Nutech roof paint. It is rated safe for drinking water. A friend who does roof restorations gave us some for free as well.
Be back later with the updated pics!
26/10/2007
Well here it is! Did a trial inside the enclosure and the fit on the sides it perfect. Still have work to do on the top with the waterfall so this hasn't been painted yet.
Photos are not picking up the true colours, even the close up isn't quite right. The close up shows one of the spots I have created for a plant.


30/10/2007
Working on the pond, the idea is the waterfall will come down into a pond, then have a overflow into a smaller pond that has a permanent outlet out of the bottom of the tank. A large plastic tub under the tank will catch the water and a water pump will then send it back up for the waterfall.
I have used a large polystyrene box, cut some bits off and added other bits. Cut a hole in the bottom pond for the drainage (a sink/bath drain from bunnings). Used the wood glue liberally, then coated it with the gripset liberally to try and prevent as many leaks as possible. When it was dry tested it and of course had a lot of leaks!! lol Used a whole tube of the silicon and a day later tested again, still too many leaks so coated the joined area with a layer of cement.
Painted with the brown, grey and green roof paints.

03/11/2007
Drilled holes under the land area and glued in the sink strainers for drainage. Will be placing tubs under the stand so the water can permanently drip out.


04/11/2007 - 08/11/2007
Determined to use the Melbourne Cup Public Holiday as our D day, have spent every hour we can putting it all together. Painted the exterior with Cream semi gloss paint and using pieces of wood we already had, plus some mini corrugated iron created the stand. The rear of the stand is open for access to the tubs, it is on wheels for mobility. As exhausted as we where late Tuesday night after installing it in the house, I suddenly had to get the plants in! Had a few damaged bits of the rock wall I had to touch up over the last few days, and now have to wait about a week before I get the waterfall running and add my frogs.
So here it is!!
To be honest I was speechless when I stood back and looked at it. The common reaction from the few friends that have been over has been, WOW!!
I still have some polystyrene exposed on the pond waterfall as I want to check it is the correct height.
I will post more pics next week with the frogs in.

List of plants:
Top Left
Spanish Moss, Tillandsia usneoides
Upper Shelf, left to right
Kenilworth Ivy, Linaria Cymbalaria
Spanish Moss, Tillandsia usneoides
Unknown Fern (A piece from friend)
Bromeliad-
Lower Shelf
African Violet, Saintpaulia
Upper floor of tank
Left of Pond
Paroo Lily, Dianella caerulea
Spathiphyllum- Petite
Right of Pond
Birds Nest Fern, Asplenium australasicum
Caladium-Palette
Cascade Palm, Chamaedora Atrovirens
Lower floor of tank
Left of Pond
Another type of Caladium?
Miniature Calla Lilly, Zantedeschias?
Kenilworth Ivy, Linaria Cymbalaria